Discover the power of Swift Package Manager for efficient dependency management in iOS development. Learn setup, integration, and best practices in this guide.
INTRO
Effective management of dependencies is important for creating scalable and maintainable applications in the quickly changing field of iOS development. Now introduce the Swift Package Manager (SPM), an effective tool that makes organizing and integrating third-party libraries and frameworks faster.
Whether you are an experienced iOS developer or are just getting started, knowing SPM can significantly enhance your workflow. We’ll go over what Swift Package Manager is, how to use it, and why it needs to be an essential part of your development toolset in this comprehensive blog post.
What is Swift Package Manager?
Apple created Swift Package Manager (SPM), a package management application designed just for Swift. For their projects, developers can use it to specify, fetch, and manage dependencies. SPM was introduced with Swift 3.0 to provide a standardized and effective method for managing dependencies, automating building procedures, and ensuring compatibility amongst various Swift projects.
Key Features of Swift Package Manager
Dependency Management: SPM makes it easy to add, update, and remove dependencies from your project. It automatically handles versioning and ensures that your project uses compatible versions of libraries.
Integrated with XCode: From XCode 11 onwards, SPM is integrated directly into XCode, making it seamless to add and manage packages without leaving your development environment.
Cross-Platform Support: While primarily used for iOS development, SPM also supports macOS, watchOS, and tvOS, making it versatile for various Apple platforms.
Getting Started with Swift Package Manager
1. Setting Up a New Swift Package
To create a new Swift package, follow these steps:
Open Terminal: Launch your terminal application.
Create a New Directory: Navigate to the directory where you want to create your package and run:
mkdir MySwiftPackage
cd MySwiftPackage
Initialize the Package: Run the following command to initialize a new Swift package:
swift package init –type library
2. Understanding the Package.swift File
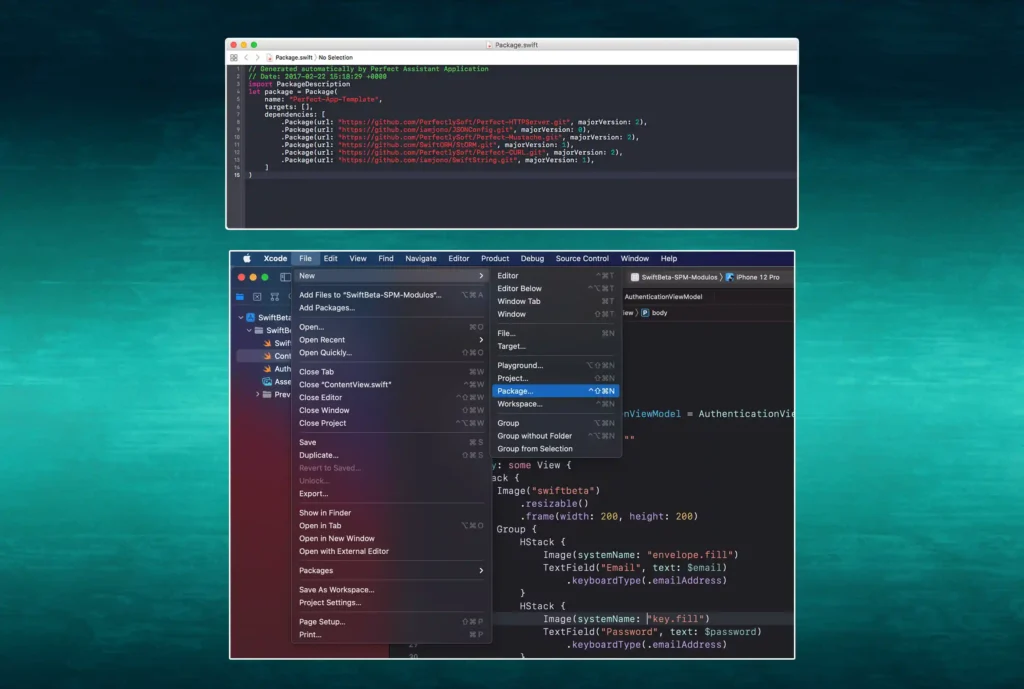
The Package.swift file is the heart of your Swift package. It defines the package name, dependencies, targets, and other configurations. Here’s a simple example of a Package.swift file:
// swift-tools-version:5.3
import PackageDescription
let package = Package(
name: “MySwiftPackage”,
platforms: [
.iOS(.v13)
],
products: [
.library(
name: “MySwiftPackage”,
targets: [“MySwiftPackage”]),
],
dependencies: [
// Dependencies declare other packages that this package depends on.
],
targets: [
.target(
name: “MySwiftPackage”,
dependencies: []),
.testTarget(
name: “MySwiftPackageTests”,
dependencies: [“MySwiftPackage”]),
]
)
3. Adding Dependencies
To add dependencies to your package, you need to specify them in the dependencies array in your Package.swift file. For example, to add a popular JSON parsing library, you can modify the file as follows:
dependencies: [
.package(url: “https://github.com/SwiftyJSON/SwiftyJSON.git”, from: “5.0.0”)
],
targets: [
.target(
name: “MySwiftPackage”,
dependencies: [“SwiftyJSON”]),
]
4. Integrating Swift Package Manager with Xcode
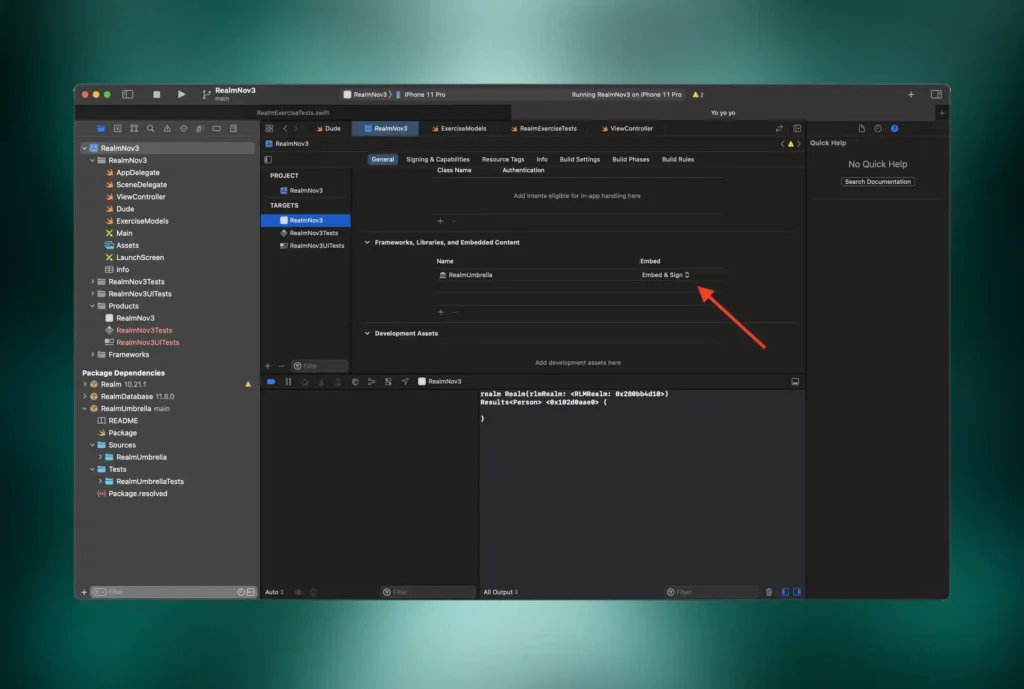
Integrating SPM with Xcode is straightforward. Follow these steps to add a Swift package to your Xcode project:
Open Your Xcode Project: Launch Xcode and open your existing project or create a new one.
Add a Package Dependency: Select your project in the Project Navigator, then go to the “Package Dependencies” tab.
Add a New Package: Click the “+” button and enter the URL of the Swift package repository. Specify the version range or branch you want to use, and click “Next.”
Add the Package: Select the package products you want to include in your project and click “Finish.”
Xcode will now fetch the package and integrate it into your project. You can start using the package in your code by importing it.
5. Building and Testing with Swift Package Manager
SPM provides a suite of tools for building and testing your packages. To build your package, navigate to the package directory in the terminal and run:
swift build
To test your package, use the following command:
swift test
These commands allow you to compile and test your code without needing to open Xcode, making it convenient for continuous integration and deployment workflows.
Benefits of Using Swift Package Manager
Simplified Dependency Management
SPM handles the complexities of dependency management, ensuring that your project always uses compatible versions of libraries. This reduces the risk of conflicts and simplifies the process of updating dependencies.
Seamless Integration with Xcode
The integration of SPM with Xcode simplifies the workflow for iOS developers. You can add, update, and remove packages directly from Xcode, without needing to use external tools or manually manage dependencies.
Improved Collaboration
With SPM, sharing code between projects and teams becomes easier. Packages can be versioned and distributed via public or private repositories, allowing teams to collaborate more effectively and maintain consistency across projects.
Open Source and Community-Driven
As an open-source project, SPM benefits from contributions from the developer community. This ensures that it stays up to date with the latest advancements in Swift and continues to evolve to meet the needs of developers.
Cross-Platform Compatibility
SPM supports multiple Apple platforms, including iOS, macOS, watchOS, and tvOS. This makes it a versatile tool for developing applications across the Apple ecosystem.
Best Practices for Using Swift Package Manager
Keep Packages Small and Focused: Aim to create small, focused packages that do one thing well. This makes them easier to maintain and reuse across different projects.
Use Semantic Versioning: Follow semantic versioning conventions to manage package versions. This helps ensure compatibility and makes it easier to update dependencies.
Write Comprehensive Tests: Include comprehensive tests for your packages to ensure reliability and prevent regressions. Use Swift test to run your tests and validate your code.
Document Your Packages: Provide clear documentation for your packages, including usage instructions and examples. This helps other developers understand how to use your packages and contributes to a better overall developer experience.
Stay Updated: Regularly check for updates to your dependencies and the Swift Package Manager itself. Keeping your tools and libraries up-to-date helps ensure compatibility and security.
FAQS
Swift Package Manager (SPM) is a tool developed by Apple for managing Swift code dependencies. It helps you define, fetch, and manage third-party libraries and frameworks, streamlining the process of incorporating external code into your projects.
The Package.swift file is the central configuration file for a Swift package. It defines the package name, platforms, products, dependencies, and targets. This file is essential for specifying how your package should be built and what it depends on.
No, Swift Package Manager is versatile and supports multiple Apple platforms, including macOS, watchOS, and tvOS, in addition to iOS. This makes it a valuable tool for cross-platform Apple development.
Conclusion
Swift Package Manager is a powerful tool that simplifies dependency management and enhances the development workflow for iOS developers. With its seamless integration with Xcode, cross-platform support, and open-source nature, SPM is an invaluable addition to any developer’s toolkit. By understanding how to use SPM effectively, you can simplify your development process, improve collaboration, and build more maintainable and scalable applications.
Whether you’re managing a complex project with multiple dependencies or simply looking for a better way to organize your code, Swift Package Manager provides the tools you need to succeed. accept the power of SPM and take your iOS development skills to the next level.


